Welcome Day Platform, How we've built it?
Imagine a virtual place where you can gather your community, we've done it, and we are showing you how!


We, the Algiers chapter of Google Developer Groups, used to have an annual meetup where we introduce people to our community, our values and the cool things we do... a meetup that was usually held in person, in front of the university students, but in the last couple of years, holding an in-person event has become difficult, leaving us no choice but to migrate to online events. Welcome days are very important, it's the first impression a new member can have on your community, so we needed to find a way to simulate the immersive environment you'll find in our community and that's very much what Metaverse is all about.
“The metaverse is a virtual world that users can explore using personalized avatars. It extends beyond gaming and allows visitors to interact virtually and experience various activities in real-time.” [How to invest in the metaverse: A step-by-step guide]
Many platforms offer this type of service which allows you to hold your virtual meetings, events and conferences in a customisable virtual space, allowing for audio-visual communication and video conferencing type of meetings. The downside is that this is a very expensive service that a university club cannot afford (~1500USD), so as a group of developers we had to create our own version of this.
💡 Note that the free version that Workadventure is offering is only limited to 14max users, the self-hosted version is unlimited (depends on the server that you’re hosting with).What is WorkAdventure?
WorkAdventure is a web-based collaborative workspace presented in the form of a 16-bit video game. In WorkAdventure you can move around your office and talk to your colleagues (using a video-chat system, triggered when you approach someone), the nice thing about this project is that the source code of this is open-source, you can therefore take the source code of WorkAdventure and install it on your own server. Some functionalities like Access management, Auto login token, Promoting sponsors, characters Personalization, Moderator controls, Dashboard, Pushing global messages, Publishing meetings to Youtube Live, Record meetings and Google Calendar integration have to be implemented by yourself, if you want to have any of them.
In order to explain how we’ve Self-Hosted a WorkAdventure instance, we’ll try to divide this into two sections, first we’ll try to explain how to set-up your development environment using Docker, then we’ll explain how to build a custom map and integrate it to the platform.
Setting-up your development environment
To understand how WorkAdventure actually works, we need to first make the difference between the basic building blocs of this application, understanding the difference between the actual instance of workadventure and the hosted map is very crucial.
The WorkAdventure instance is a web application based on a microservice architecture, it is composed of multiple microservices where each one is responsible for a specific actions, this instance will be responsible to offer functionalities like: Rendering a hosted map, managing users interactions, managing meetings ... On the other hand a map is just a self hosted files that serves as a representation of the actual rendered map, once a map is linked to an instance of workadventure this one will take care of rendering it. This concept is allowing a big flexibility using this application as we can use one instance of workadventure to test and render multiple maps.
In this section we will talk mainly about setting up your instance, remember that you can use any hosted instance to test your map, but if you want to have control on the number of users, and other configurations then follow this guideline in order to get your instance installed:
# 1- Clone the github repository
git clone git@github.com:thecodingmachine/workadventure.git

# 2 - Copy the env file
# this will hold environment variables
cp .env.template .env
# 3- Delete the docker-compose.yaml
rm docker-compose.yaml
After removing the old docker-compose.yaml create a new file and add the following configuration:
version: "3.3"
services:
  reverse-proxy:
    image: traefik:v2.5
    command:
      - --log.level=WARN
      - --providers.docker
      - --entryPoints.web.address=:80
    ports:
      - "9999:80"
    depends_on:
      - pusher
      - front
    volumes:
      - /var/run/docker.sock:/var/run/docker.sock
    restart: unless-stopped

  front:
    build:
      context: ./
      dockerfile: front/Dockerfile
    environment:
      DEBUG_MODE: "$DEBUG_MODE"
      JITSI_URL: $JITSI_URL
      JITSI_PRIVATE_MODE: "$JITSI_PRIVATE_MODE"
      PUSHER_URL: /pusher
      ADMIN_URL: /admin
      TURN_SERVER: "${TURN_SERVER}"
      TURN_USER: "${TURN_USER}"
      TURN_PASSWORD: "${TURN_PASSWORD}"
      MAX_PER_GROUP: "${MAX_PER_GROUP}"
      MAX_USERNAME_LENGTH: "${MAX_USERNAME_LENGTH}"
      START_ROOM_URL: "${START_ROOM_URL}"
      DISABLE_NOTIFICATIONS: "${DISABLE_NOTIFICATIONS}"
      SKIP_RENDER_OPTIMIZATIONS: "${SKIP_RENDER_OPTIMIZATIONS}"
    labels:
      - "traefik.http.routers.front.rule=PathPrefix(`/`)"
      - "traefik.http.routers.front.entryPoints=web"
      - "traefik.http.services.front.loadbalancer.server.port=80"
      - "traefik.http.routers.front.service=front"
    restart: unless-stopped

  pusher:
    build:
      context: ./
      dockerfile: pusher/Dockerfile
    environment:
      SECRET_JITSI_KEY: "${SECRET_JITSI_KEY}"
      SECRET_KEY: ${SECRET_KEY}
      API_URL: back:50051
      ADMIN_API_URL: "${ADMIN_API_URL}"
      ADMIN_API_TOKEN: "${ADMIN_API_TOKEN}"
      JITSI_URL: ${JITSI_URL}
      JITSI_ISS: ${JITSI_ISS}
      FRONT_URL : ${FRONT_URL}
    labels:
      - "traefik.http.middlewares.strip-pusher-prefix.stripprefix.prefixes=/pusher"
      - "traefik.http.routers.pusher.rule=PathPrefix(`/pusher`)"
      - "traefik.http.routers.pusher.middlewares=strip-pusher-prefix@docker"
      - "traefik.http.routers.pusher.entryPoints=web"
      - "traefik.http.services.pusher.loadbalancer.server.port=8080"
      - "traefik.http.routers.pusher.service=pusher"
    restart: unless-stopped

  back:
    build:
      context: ./
      dockerfile: back/Dockerfile
    environment:
      SECRET_KEY: ${SECRET_KEY}
      STARTUP_COMMAND_1: yarn install
      SECRET_JITSI_KEY: "${SECRET_JITSI_KEY}"
      ADMIN_API_TOKEN: "${ADMIN_API_TOKEN}"
      ADMIN_API_URL: "${ADMIN_API_URL}"
      JITSI_URL: ${JITSI_URL}
      JITSI_ISS: ${JITSI_ISS}
      MAX_PER_GROUP: ${MAX_PER_GROUP}
      TURN_STATIC_AUTH_SECRET: "${TURN_STATIC_AUTH_SECRET}"
      REDIS_HOST: redis
    labels:
      - "traefik.http.middlewares.strip-api-prefix.stripprefix.prefixes=/api"
      - "traefik.http.routers.back.rule=PathPrefix(`/api`)"
      - "traefik.http.routers.back.middlewares=strip-api-prefix@docker"
      - "traefik.http.routers.back.entryPoints=web"
      - "traefik.http.services.back.loadbalancer.server.port=8080"
      - "traefik.http.routers.back.service=back"
    restart: unless-stopped

  redis:
    image: redis:6
    restart: unless-stopped
You can then start the WorkAdventure instance with
docker-compose up -d
# check up if the instance is running correctly
docker ps
Now you have a running instance, you may configure your DNS server to point out to the ip you have used to deploy your application, for our case we have used NameCheap.
We have used Azure to host our instance and to offer an SSL certificate and also offering a layer of security over our application, we have used also Nginx as a reverse proxy, we have based our configuration over these main resources that we highly advise to check:
- A detailed installation process video (it talks also about the setup of DNS, setup of Nginx) https://www.youtube.com/watch?v=Yx6xSptPA5U
- A nice short video of fast installing WorkAdventure https://www.youtube.com/watch?v=NQrxne7lS3
- Documentation of WorkAdventure https://github.com/thecodingmachine/workadventure/
Build your custom map
In this section we’ll try to give you the resources, documentation and tools that helped us to create the custom map, the tricks that could save you A LOT of time, and some tips on how you should design your map.
There’s a very good documentation by Workadventure on how to build your own map, so we wont concentrate very much on this, instead what you should know is that you’re going to use the Tiled software to build your map.
To get started with editing maps on Tiled we advice you to take a look at this series of tutorials provided by Workadventure,
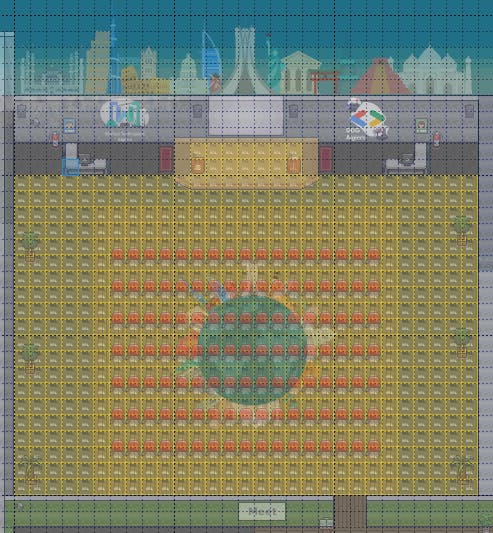
Designing the rooms
One thing we found helpful to start off with is an open-source map, that looks similar to what you’re planning to have in your event, we personally have used this map, this could save you a lot of time searching for assets designing rooms architecture and more.
Next will be to draw a sketch on what you plan having in your map, we advice not to spend a lot of time thinking here, a lot of ideas would come later when you start designing your map.
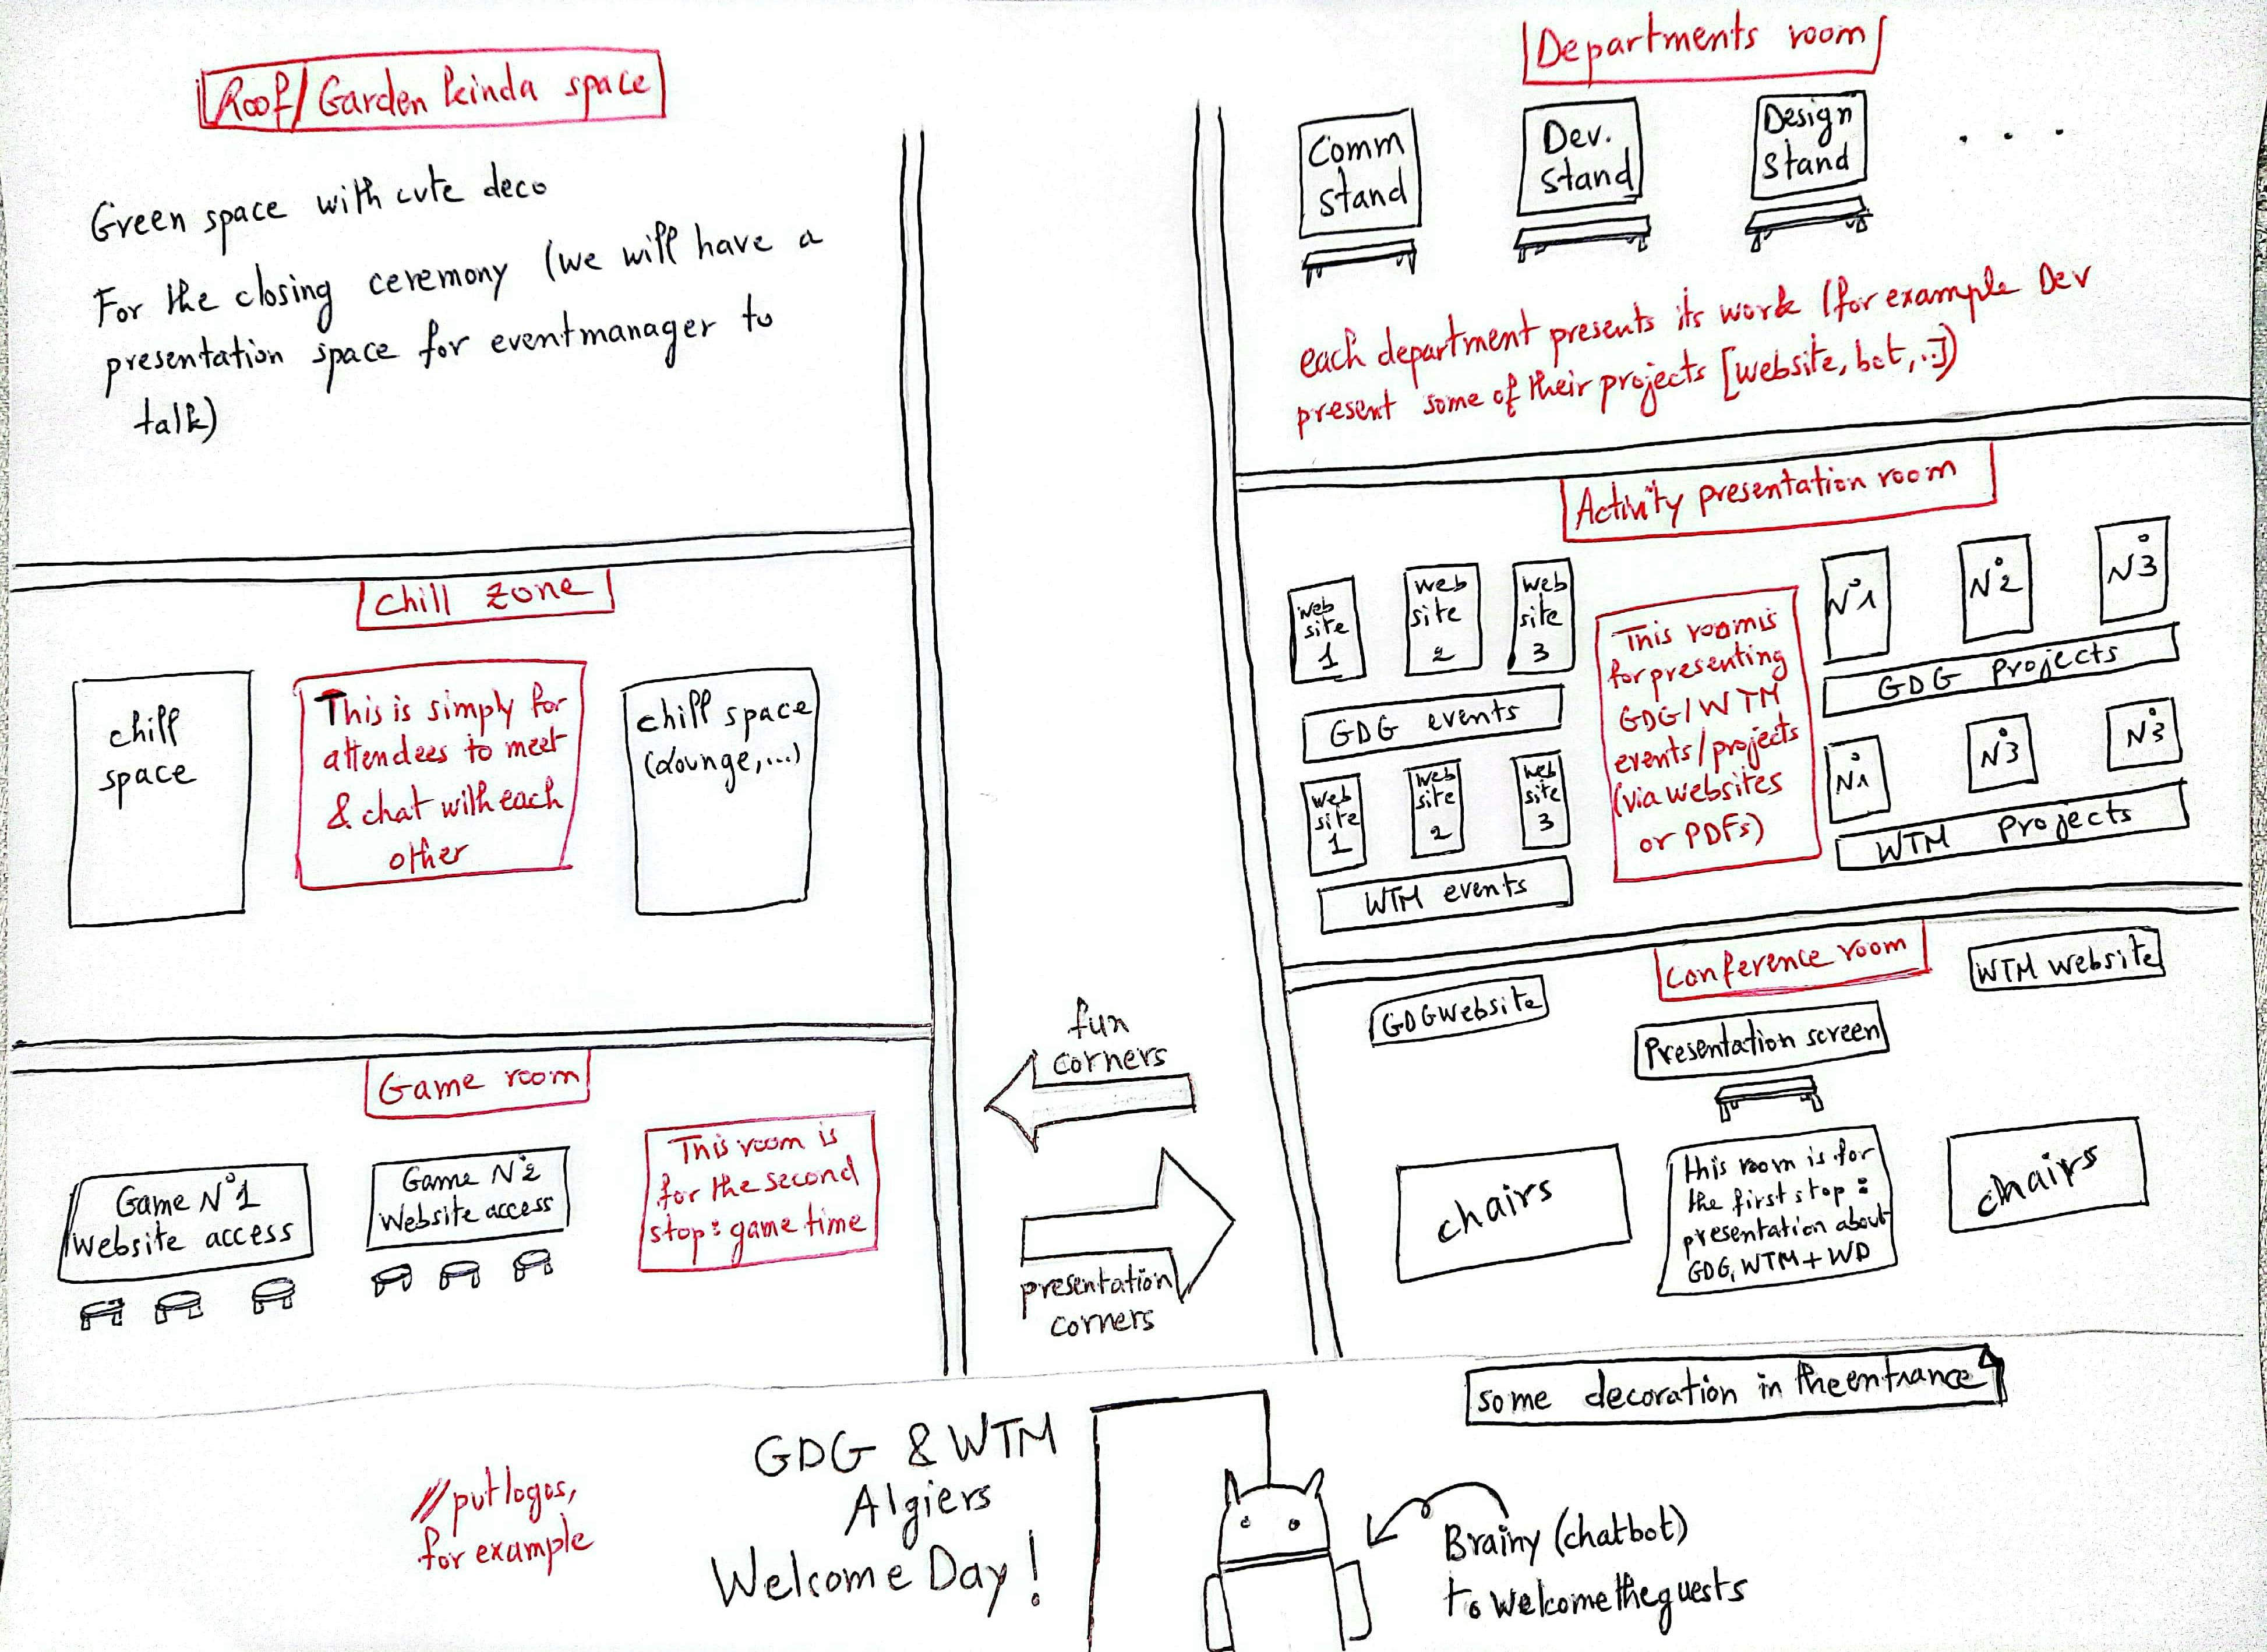
note that you don’t need to follow the exact structure of the sketch you draw, it is more like a guide through designing the different rooms.
Note on using version-control tools enabling collaboration like Git/GitHub
💡 when editing your map, you’ll be modifying a map.json file that won’t enable you to collaborate simultaneously and merge branches, this would create unsolvable conflicts due to the nature of the map.json file.Creating our map
The live stream zone
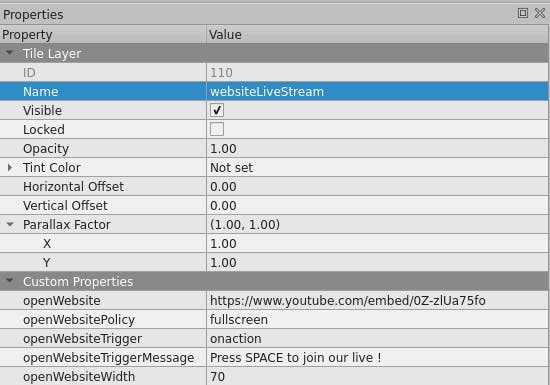
this room was destined to host our welcome day live stream, thus it was only composed of one URL zone.
You can simply embed websites by creating a layer for your website, and adding the bellow properties to it.
Note on embedding iframes
💡 As you might know not any website could be embedded as iframe, some forbid being opened by iframes using the `X-Frame-Options HTTP header.Note on importing external assets
💡 In Tiled, everything is a tile, which is basically a 32x32 pixel image, before importing any external asset make sure to know where you're going to place it, thus having an idea on what size your asset should be, one tool we found useful for creating and resizing pixel images is PISKEL, Also make sure to place your assets in the src/assets folder when importing it.The discord space
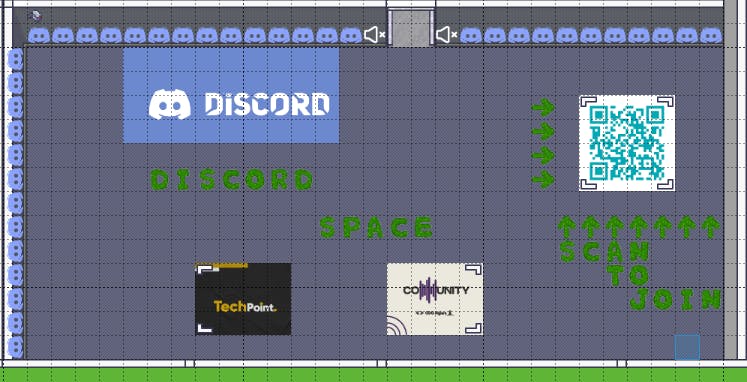
This is a more of a special space to discover and join our Discord server(Scan the QR code below to join), was composed of one zone with embedded google slides on it.
The departments zone
This space was dedicated for presenting our different department through slides thus we dedicated ZONE tiles for each one.
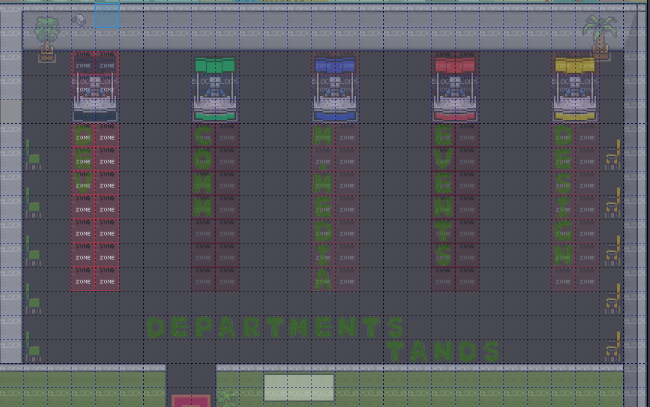
Note concerning embedding websites in your map
💡 if you try to embed a website you’ll notice that it could become exasperating when the website pops up at you without giving it the permission
The solution to that would be to ask the user if they want to check the website or just ignore it, by adding the property “openWebsiteTrigger”, setting it to “onaction”, then adding the “openWebsiteTriggerMessage” property, where you could set a custom message for the user.

Events/Projects space
This space is dedicated to showcase our projects and events, this was a simple space composed of multiple special zones tiles.

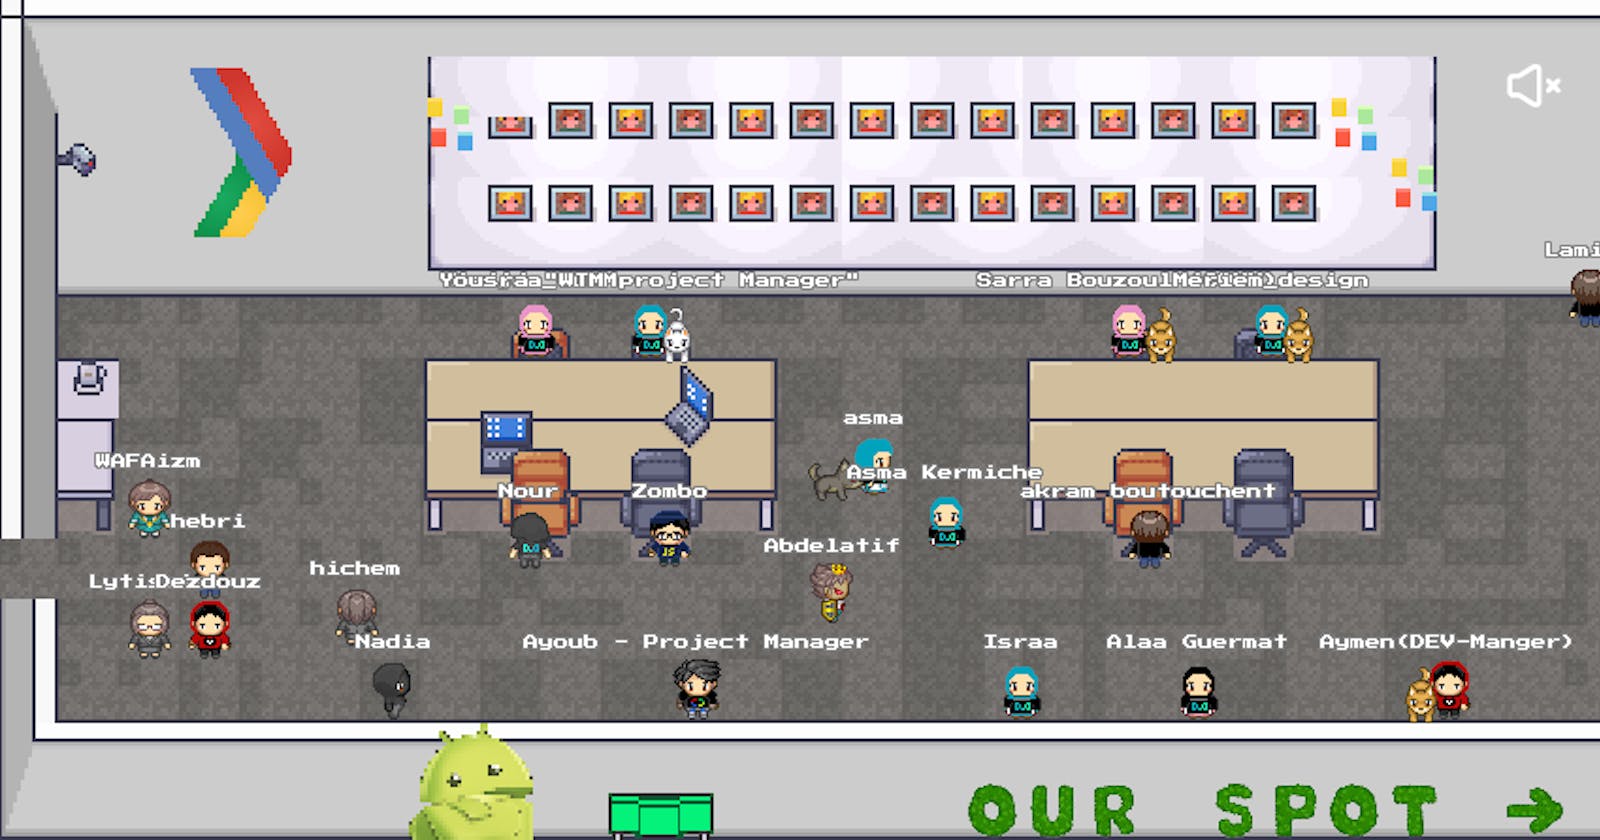
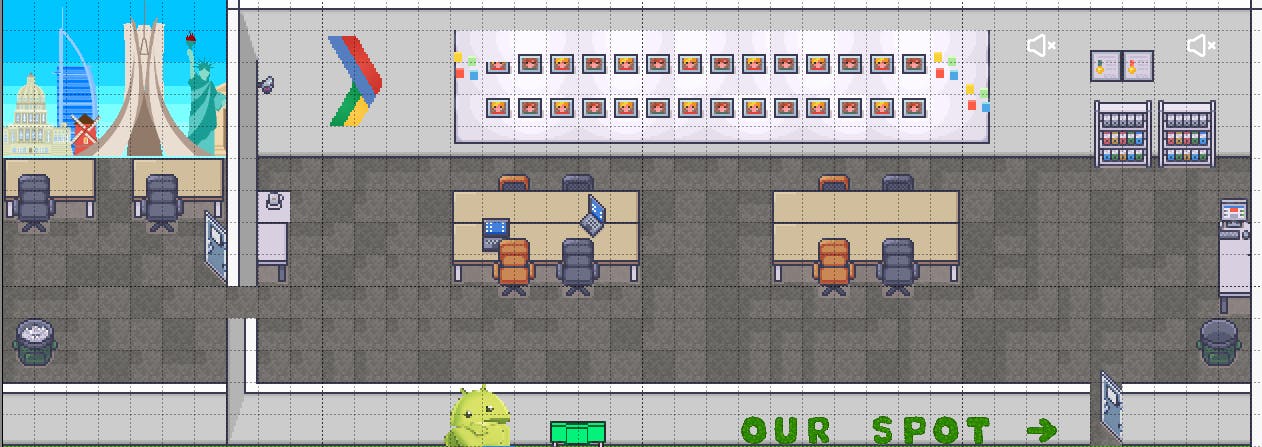
Our spot
This was a real remake of our spot, we tried to give a nostalgic feeling to our members and let newcomers discover the place where they’ll meet for their journey with us.
About scripting the map
Client-side scripts are made in Javascript (or Typescript).
There are two ways to use the scripting language:
- In the map: By directly referencing a Javascript file in your map, in the script property of your card.
- In an iFrame: By placing your Javascript script in an iFrame, your script can communicate with the WorkAdventure game
WA objects contain a number of useful methods enabling you to interact with the WorkAdventure game. For instance, WA.chat.sendChatMessage opens the chat and adds a message in it.
WA.chat.sendChatMessage('Hello world', 'Mr Robot');
Adding popups for a better user experience
Popups are typical map object that are shown when an event happen, an event can be a user just entering a specific zone, a user sending a message... To show a popup you need to create first an object in your tiled map, then you will need to use the scripting API of workadventure in order to show these popups.

We have created two functions as utility, first one show popup with a zone name, Notice that the name of the popup object should be zoneName-Poppup, and another function to close the current popup
function openPopup(zoneName: string) {
  currentZone = zoneName;
  const popupName = zoneName + "Popup";
  const zone = config.find((item) => {
    return item.zone == zoneName;
  });

  if (typeof zone !== "undefined") {
    // @ts-ignore otherwise we can't use zone.cta object
    currentPopup = WA.ui.openPopup(popupName, zone.message, zone.cta);
  }
}
function closePopup() {
  if (typeof currentPopup !== "undefined") {
    currentPopup.close();
    currentPopup = undefined;
  }
}
To show a popup we need to listen for events like this:
// show a poppup on entering the zone of games
WA.room.onEnterZone("games", () => openPopup("games"));
// close the poppup on leaving this zoneWA.room.onEnterZone("games", () => openPopup("games"));
WA.room.onLeaveZone("games", closePopup);
WA.room.onLeaveZone("games", closePopup);
Last layer
From now on you can go more creative if you have more time, but make sure that the platform you’re building must be an enjoyable space for your community.
GitHub Repository
Welcome Day Map, Welcome Day Platform
Thanking our contributors
Without the commitment of these people, this platform would never have seen the light of day in an incredibly short period of time. A big thank you to all those who have contributed to this project, each in one way or another.
Contributors: Abdelghani Meliani, Israa Hamdine, Akram Boutouchent, Aymen Berriche.
This masterpiece would not have been possible without the help of our design team, who provided us with these beautiful assets, and the communication team, who provided us with this valuable content.
A big thank you to Yousra Farhani for drawing our characters pixel by pixel, which added a special touch to the atmosphere.
Co-Writer : Akram Boutouchent.